1) Open NetBeans , Select File > New Project
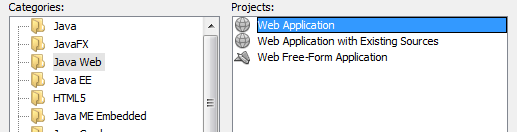
2) Under Categories select "Java Web" and under Projects select "Web Application" as shown above and click "Next". In the window enter your preferred project name, in this case we use "UserReg" , select where to store your project or leave it to store in the default NetBeans folder and click Next.

3) In the next window , make sure that Glassfish is selected as the default server.
4) Select "Java EE 6 Web" as JavaEE version
5) Check "Enable Contexts and Dependency Injection " ( I'll this explain later) check box and click "Next"

6 ) Since we'll be using the JSF Framework, select "Java Server Faces" check box under frameworks in the next window. and Click "Finish" .

Congratulations ! now you've created your first Java EE project , now you'll learn how to Configure a Data Source (Database) .
No comments:
Post a Comment